- Hard refresh — press
Ctrl + Shift + RorCtrl + F5(Windows/Linux) orCmd + Shift + R(Mac) - Clear site cache — open your browser settings → Clear browsing data → select Cached images and files → Clear
- On mobile — in your browser menu, tap Clear cache or Clear browsing data, then reload the page
Getting Around
- Left Rail (Navigation)
- Map Toolbar (Left Edge of Map)
- Sidebar (Lists, Marks, Trips, Catches)
- Profile Menu (Top-Right)
Left Rail — Navigation
The vertical Left Rail along the far-left edge is the main navigation. Hover or click the chevron at the bottom to expand it. It’s grouped into four sections:
- View: Lists (default), Trips, Catches — switches the sidebar to that content.
- Transfer: Import, Export — replaces the old Data menu.
- Manage: Marks, Routes, Tracks, Bulk Entry, Duplicate Cleanup.
- Social: Refer a Friend.
Map Toolbar — Left Edge of the Map
A compact floating toolbar sits along the left edge of the map. It holds the spatial tools — the actions that feel natural right next to the map.
Marks group
- + Add New Mark: drops a new mark at the current map center.
- Rectangle Select: drag a box on the map to multi-select marks.
- Lasso Select: draw a freehand shape to multi-select marks.
- Labels: opens a picker with four density levels — Off, Minimal, Balanced (default), Dense.
- Clustering: toggles marker clustering on/off.
Routes group
- + Create a Route: enters route builder mode — click points on the map, then save.
Tracks group (appears when tracks are on the map)
- Rectangle Select: box-select tracks for bulk actions.
- Lasso Select: freehand-select tracks for bulk actions.
- Trim (scissors): cut unwanted sections out of a track.
Sidebar — Lists, Marks, Trips, Catches
The Sidebar is the content panel next to the Left Rail. Its content changes based on what you picked on the rail:
- Lists (default): search bar, your lists, tabs for Marks / Tracks / Routes, and a Create List button at the bottom.
- Trips: a Trips quick panel with search, sort, and a + button to log a new trip.
- Catches: a Catches quick panel with search, filters, species grouping, and a + button to record a catch.
Profile Menu — Top-Right
Click your profile icon in the top-right corner for account actions:
- My Profile — account and subscription details.
- My Preferences — units, map layer, default symbol, and other preferences.
- My Friends — add friends, accept pending requests, manage friendships.
- My Calendar — view trips and catches on a calendar (Angler / Captain).
- My Encryption, My Data, My History, My Trash Bin — privacy, downloads, activity, recover recently deleted items.
- Log Out.
Marks
- Manually Add Marks
- Edit a Mark
- Delete a Single Mark
- Delete Multiple Marks
- Use Near Me (Proximity Search)
Manually Add Marks
From the Map (Double-Click)
- Double-click (or double-tap on mobile) anywhere on the map.
- A quick action menu opens at that point with three options:
- Add Mark Here — opens the Add Mark form with the coordinates pre-filled.
- Nearby Here — runs a proximity search centered on that spot (Angler+).
- Weather Here — pulls the forecast for that exact location (Captain).
- Choose Add Mark Here, then name your mark and optionally add notes, tags, depth, or water temperature.
- Click Add Mark — your new mark appears on the map immediately.
From the Map Toolbar
- Click the + button in the Marks group of the Map Toolbar (left edge of the map).
- A new mark drops at the current map center and the Add Mark form opens so you can name it and adjust details.
- Double-click (or double-tap) any point on the map → quick action menu: Add Mark Here, Nearby Here, Weather Here.
- Right-click (or long-press) any point → context menu with Search Near Here and other location-aware actions.
- Click a mark on the map or in the sidebar → opens the Edit Mark form directly.
- Right-click a mark or list in the sidebar → quick actions like Add to List, Share, Export, Delete.
Edit a Mark
Open the Edit Form
- Click a mark on the map, or click its row in the sidebar.
- The Edit Mark form opens directly — no extra step.
What You Can Change
- Name: type a new name in the Name field.
- Symbol / Icon: click the symbol button to browse and pick a new icon and color.
- Coordinates: edit latitude and longitude directly, or click Use Map Center to snap the mark to the current crosshair position.
- Depth & water temperature: enter or update the values (in your preferred units).
- Date: change when the mark was created / discovered.
- Notes: add or edit free-text notes about the spot.
- Tags: add, remove, or manage tags for organizing and filtering.
- Lists: add the mark to one or more lists from the form.
- Record Catch: tap the Record Catch button to log a catch linked to this mark (Angler+).
Click Save when you’re done.
Delete a Single Mark
From the Sidebar
- Find the mark in the sidebar list.
- Right-click (or long-press on mobile) to open the context menu.
- Choose Delete and confirm.
From the Edit Mark Form
- Click the mark on the map or in the sidebar to open the Edit Mark form.
- Click the red Delete button at the bottom of the form.
- Confirm the deletion.
Delete Multiple Marks
Using Rectangle or Lasso on the Map
- In the Marks group on the Map Toolbar (left edge of the map), click the Rectangle or Lasso button. The button turns yellow to show it’s active.
- Drag a rectangle (or draw a freehand lasso) on the map around the marks you want.
- All marks inside the selection area are selected — an Actions menu opens automatically.
- Choose Delete and confirm.
Using Multi-Select from the Sidebar
- In the Lists view, switch to the Marks tab of the sidebar.
- Toggle multi-select and tap the checkboxes next to the marks you want, or use Select All (visible results).
- Choose Delete from the selection actions and confirm.
Use Near Me (Proximity Search)
Search from Your Location
- In the sidebar (Lists view), click the crosshair icon inside the search bar.
- Allow location access when your browser asks — your GPS position becomes the search center.
- A circle overlay appears on the map showing your search radius.
- Results are sorted nearest-first, with a distance badge on each mark.
Search Near Any Point
- Right-click (or long-press) anywhere on the map.
- Choose “Search Near Here” from the context menu.
- The search centers on that point instead of your GPS position.
Adjusting the Radius
- Once Near Me is active, a radius dropdown appears below the search bar.
- Pick a preset — the circle overlay and results update immediately.
Import & Export
- Recommended Workflow (Round-Trip)
- Export from Your Chartplotter
- Export from the App
- Symbol Options on Export
- Export Selected Tracks or Routes
- Import Marks from a GPX File
- Backfill Original Symbols on Existing Marks
- Import Marks from a CSV File
- Generate a Captain’s Journal (PDF)
- Import into Your Chartplotter
- Share to Chartplotter Apps
- Simrad App (C-MAP) — Known Issues & Workarounds
Recommended Workflow (Round-Trip)
The most reliable way to manage your spots across devices is to treat Fishmarks as your single master repository — the one place that always holds the clean, current copy — and round-trip your data through it. Organizing on a big screen, then pushing a tidy set back to the unit, avoids the duplicate pile-up and clutter that builds up when you only ever add marks on the water.
The Flow
- Export from your chartplotter or vendor app. Save your marks, tracks, and routes to a GPX file on an SD card (or export from your phone’s vendor app). See Export from Your Chartplotter for brand-by-brand steps.
- Import into Fishmarks. Go to Transfer > Import and pick the GPX. Keep Merge duplicates on (the default) so marks you already have are reused, not duplicated. Fishmarks auto-detects the device brand and maps the symbols. See Import Marks from a GPX File.
- Manage everything in Fishmarks. Organize into lists, clean up duplicates, rename, re-tag, and fix coordinates. This is now your authoritative copy — your master repository.
- Clear the slate on the device. Delete the old marks/tracks/routes from the chartplotter so it can take a fresh, clean import. On Lowrance / Simrad / B&G (Navico) units this step has a catch: deleting a waypoint on the unit doesn’t fully remove it — it’s kept in a recoverable “deleted” state and can reappear or create duplicates on your next import. Purge them for real via the Lowrance/Simrad phone app (Places > Manage > Filters > Deleted only, then remove them) or a full user-data reset on the unit.
- Export from Fishmarks in your device’s profile. Go to Transfer > Export > GPX, choose the profile that matches your unit (Garmin Compatible, Navico SD Card, etc.), and save to a blank SD card. See Export from the App.
- Load it back onto the device. Import the Fishmarks GPX from the SD card — see Import into Your Chartplotter — or push it to your vendor app, see Share to Chartplotter Apps. Note: the Garmin ActiveCaptain phone app can’t receive a shared file directly — save the GPX to your phone, then in ActiveCaptain tap User Data > Import.
- Verify before you leave the dock. Confirm the marks, tracks, and routes actually loaded onto the unit while you still have signal and time to fix it. Sorting out a failed import offshore is no fun.
Export from Your Chartplotter
Each chartplotter brand has a slightly different process, but the general idea is the same: save your waypoints to a GPX file on an SD card, then import that file into Fishmarks.
Garmin (GPSMAP, ECHOMAP)
- Insert a blank SD card into your Garmin unit.
- Go to Info > User Data > Manage Data > Transfer Data.
- Select Save to Card and choose GPX as the format.
- Wait for the save to complete, then eject the SD card.
Lowrance / Simrad / B&G
- Insert a micro SD card into your unit.
- Go to Files > My Data > Export (or Settings > Navigation > Waypoints > Export).
- Choose GPX format and select your SD card as the destination.
- Tap Export and wait for it to finish.
Raymarine (Axiom, Element)
- Insert a micro SD card.
- Go to My Data > Waypoints > Options > Export.
- Choose GPX and save to your card.
Humminbird (Helix, Solix, Apex)
- Insert a micro SD card.
- Go to Nav > Menu > Waypoints, Routes, Tracks > Export All Waypoints.
- Select GPX format and save to card.
Export from the App
Export All Marks
- On the Left Rail, go to Transfer > Export.
- Scope: choose All Marks, All Data (marks + tracks), your current selection, or one or more lists.
- Format: pick GPX (for chartplotters and GPS devices) or CSV (for spreadsheets).
- If exporting GPX, choose a device profile so the symbols are compatible with your target device:
- Garmin Compatible — for Garmin chartplotters (GPSMAP, ECHOMAP) and ActiveCaptain.
- Navico (Simrad / Lowrance / B&G) SD Card — for importing via SD card to Simrad, Lowrance, and B&G chartplotters.
- Simrad / C-MAP App — for sharing directly to the Simrad App (formerly C-MAP or Embark) on your mobile device.
- Generic GPX (Garmin-style) — standard GPX with Garmin-style symbols. Works on most GPS tools. For Simrad / Lowrance / B&G, pick one of the dedicated profiles above — those devices can’t parse Garmin’s symbol names and will render every mark as their default.
- Fishmarks (Full Data) — preserves all Fishmarks metadata including lists, tags, and diary entries (use this for backing up your own account).
- Click Export — the file downloads to your device.
Export a Specific List
- Right-click a list in the sidebar and choose Export List.
- Or open the Export modal from the Left Rail and pick the lists you want to include in the Scope step.
Symbol Options on Export
When exporting GPX, you can fine-tune how Fishmarks icons translate to symbols on your target device. Both options live inside the selected profile card in the Export modal.
Preserve Original Chartplotter Symbols (Round-Trip)
When you import waypoints from a chartplotter (Simrad, C-MAP, Garmin, Lowrance, etc.), Fishmarks captures the original symbol each mark came in with — alongside mapping it to a Fishmarks icon for display. Toggle on Preserve original device symbols in the export modal and any mark imported from that brand exports with its exact original symbol — not the default Fishmarks-to-brand mapping. So a Simrad → Fishmarks → Simrad round-trip comes back with the same symbols that left.
- The toggle only appears when at least one mark in your export scope has a captured original for the selected profile’s brand.
- A small caption shows your coverage (e.g. “412 of 528 marks have an original Simrad symbol”) so you know what to expect — anything without a captured original falls back to the profile’s default mapping.
- If you’ve explicitly changed a mark’s icon inside Fishmarks, your change wins — the captured original is cleared.
- Marks imported before this feature shipped won’t have a captured original — see Backfill Original Symbols on Existing Marks for the safe one-shot way to fill them in.
Customize Symbol Mapping for a Profile
Each export profile (Garmin, Navico, Simrad/C-MAP App, etc.) has a default mapping from Fishmarks icons to the equivalent symbol on that brand’s chartplotter. If you’d prefer a different mapping for a particular icon, click Customize symbol mapping inside the profile card.
- The Symbol Mapping editor opens with every Fishmarks icon listed alongside the symbol it maps to on the selected profile.
- Click any row to pick a different target symbol. Overridden rows are highlighted so you can see what you’ve changed.
- Your overrides persist per-profile and are used on every export to that profile until you reset them.
- Use Reset on any row to return it to the default mapping.
Export Selected Tracks or Routes
The Export modal’s scope step is mark-centric. To ship just a hand-picked set of tracks or routes — without dragging in any marks — start from the sidebar tab for that data type. Each tab has a multi-select toggle that opens a bulk-actions bar with its own Export button.
Export Selected Tracks
- In the left sidebar, switch to the Tracks tab.
- Click the multi-select button in the toolbar (top-right of the tracks list). Track rows now show a checkbox column.
- Tap the rows you want, or click Select All at the bottom to pick everything in the current view.
- In the bulk-actions bar at the bottom, click the Export button.
- The Export modal opens pre-scoped to Selected Tracks. Because GPX is the only format that carries tracks (CSV is marks-only, Captain’s Journal is marks-only), the modal skips the format step and goes straight to the device profile picker.
- Pick a profile (Generic GPX, Garmin Compatible, Navico SD Card, Simrad / C-MAP App, or Fishmarks Full Data) and click Export GPX.
Export Selected Routes
- In the left sidebar, switch to the Routes tab.
- Click the multi-select button in the toolbar.
- Tap the rows you want, or click Select All.
- In the bulk-actions bar, click the Export button.
- Pick a device profile and click Export GPX. The same routes-only flow applies — format step skipped, profiles only.
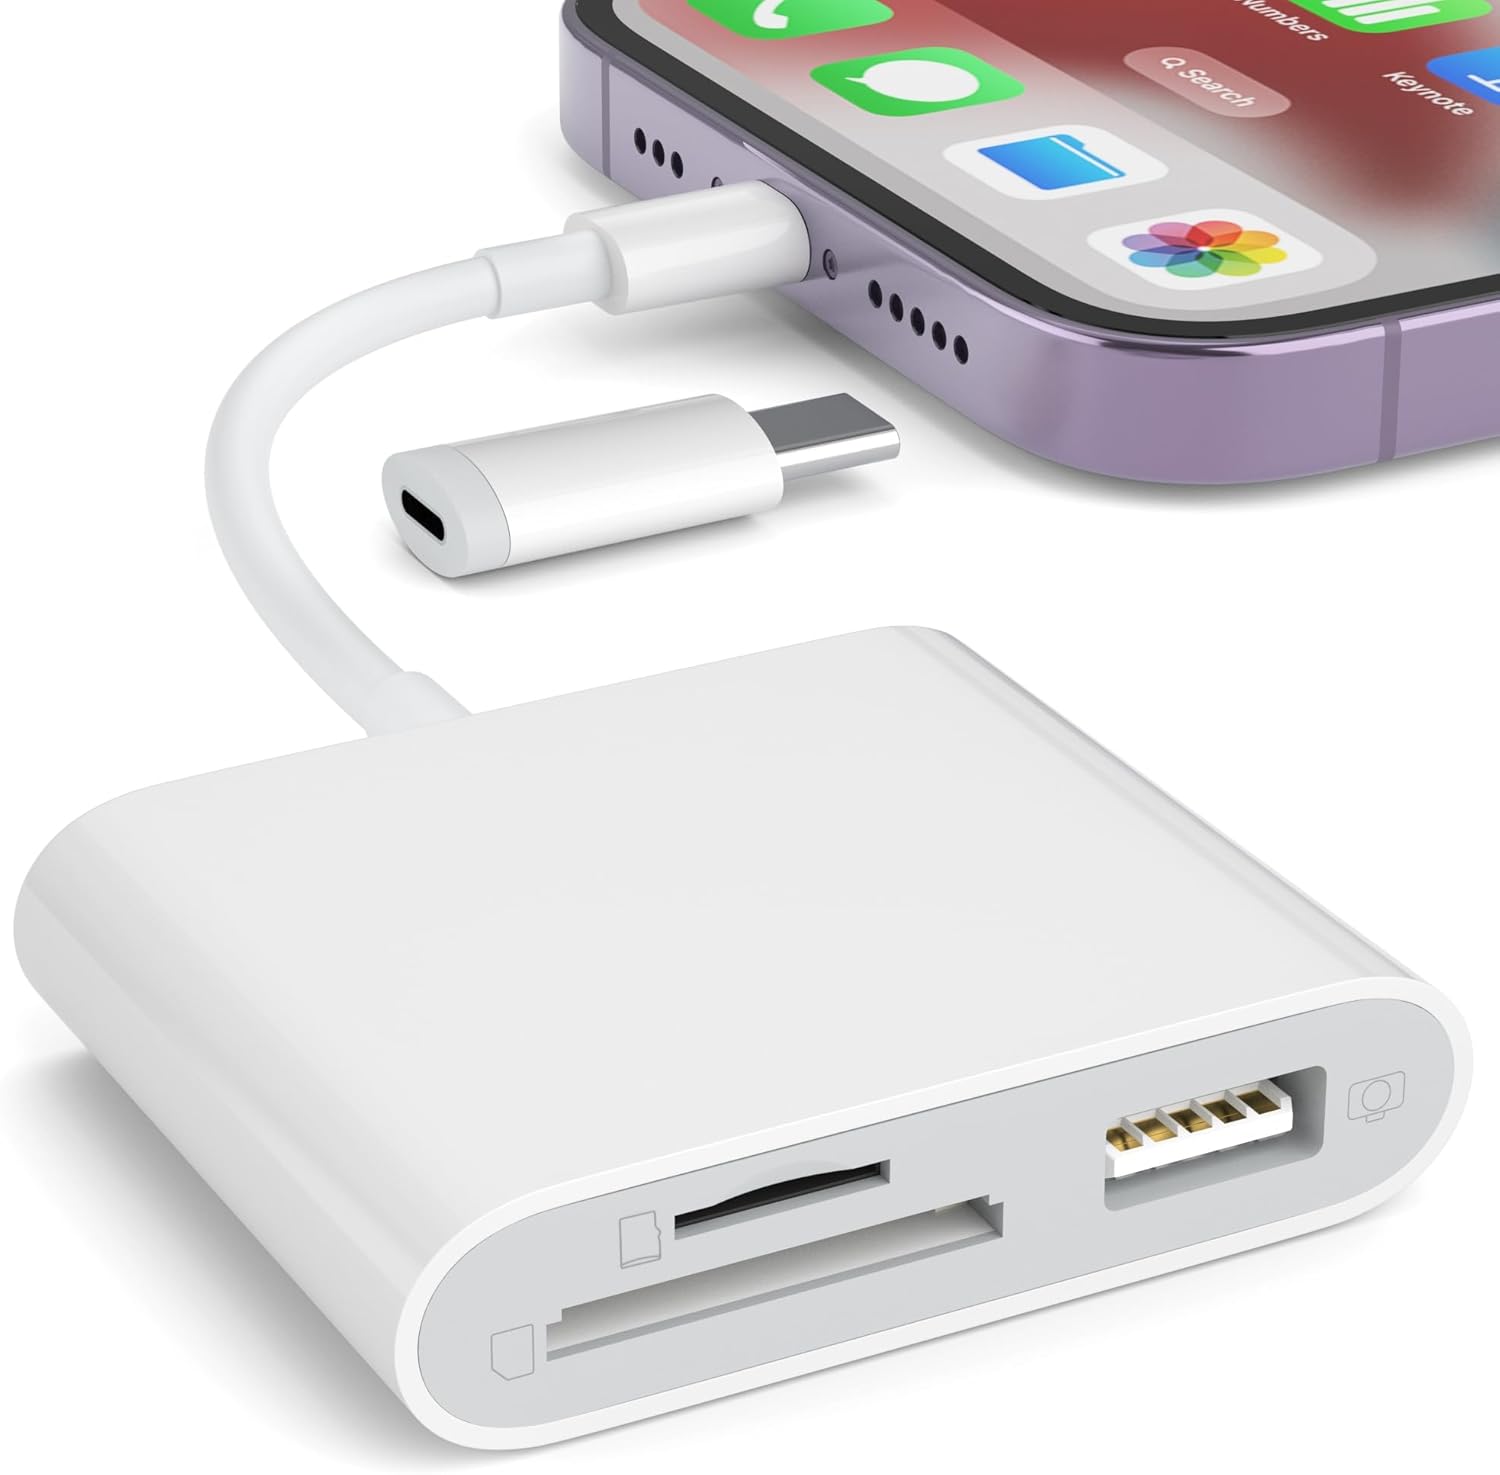
Import Marks from a GPX File
- On the Left Rail, go to Transfer > Import.
- Choose GPX, then pick the file from your computer (exported from your chartplotter, another app, or another Fishmarks account).
- Fishmarks automatically detects the source device (Garmin, Lowrance, Simrad, Humminbird, Raymarine, Furuno, and more) and maps symbols to the correct Fishmarks icons.
- Review the import preview — you’ll see how many waypoints and tracks were found, along with any duplicates detected.
- Click Import to bring them into your account.
Backfill Original Symbols on Existing Marks
If you imported your library before Fishmarks started capturing original chartplotter symbols, you can bring that metadata in without disturbing the work you’ve done in Fishmarks — renames, icon picks, list assignments, notes, and tags are all left exactly as you have them. The trick is to re-import the same GPX file from your chartplotter and pick the new Backfill original symbols only action.
- Re-export your full waypoint library from your chartplotter to a GPX file — the same file (or equivalent) you originally imported.
- In Fishmarks, click Transfer > Import on the Left Rail and choose GPX. Select the file.
- The Import Wizard opens.
- Step 1 — Summary: your existing marks show as Duplicates (matched by coordinates). That’s expected. Pick (or leave) a list, then click Continue.
- Step 2 — Duplicate Handling: select Backfill original symbols only. The label tells you how many marks will be enriched.
- Click Import. Fishmarks adds the original chartplotter symbol to each matched mark and leaves everything else untouched.
What it does NOT do
- Renames, icon/color picks, notes, list assignments, and tags are all preserved.
- If a mark already has an original symbol recorded for that brand, it’s left alone — existing data is never overwritten.
- Truly new marks (not in your library yet) are still imported as new marks; that’s normal.
When to use “Update existing” instead
Use the standard Update existing action if you also want names, notes, icons, depths, or tags refreshed from the GPX — for example, after reorganizing your spots on the chartplotter. The wizard lets you check or uncheck each field individually so you can mix and match.
Import Marks from a CSV File
- On the Left Rail, go to Transfer > Import.
- Choose CSV, then pick your CSV file. It needs columns for Name, Latitude, and Longitude at minimum.
- Optional columns include Description (or Notes), Symbol, Water Temp, Depth, and Lists.
- Review the import preview and click Import.
Column Header Flexibility
| Column | Also Accepts |
|---|---|
| Latitude | “Lat” |
| Longitude | “Lon”, “Long”, or “Lng” |
| Description | “Desc” or “Notes” |
| Lists | Use semicolons for multiple (e.g., “Reef Spots;Favorite Spots”) |
Generate a Captain’s Journal (PDF)
The Captain’s Journal generates a beautifully formatted PDF of your marks — a digital version of the traditional captain’s coordinate binder. Each entry includes the mark name, coordinates in both DD and DMS format, depth, tags, and notes.
- On the Left Rail, go to Transfer > Export.
- Click the Captain’s Journal (PDF) option at the bottom of the Export modal.
- Choose a title for your journal.
- Select an organization method: By List, Alphabetical (A–Z), or By Date Created.
- Choose which lists to include.
- Click Generate PDF — the file downloads to your device.
Import into Your Chartplotter
After exporting a GPX file from Fishmarks, load it onto your chartplotter via SD card.
Garmin (GPSMAP, ECHOMAP)
- Copy the GPX file to the root of your SD card (not inside a folder).
- Power on your Garmin unit, then insert the SD card.
- Go to Info > User Data > Manage Data > Transfer Data.
- Select Merge from Card to add the marks alongside existing data (or Replace from Card to overwrite).
Lowrance / Simrad / B&G
- Copy the GPX file to the root of your micro SD card.
- Power on your unit, then insert the card.
- Go to Files and navigate to your SD card.
- Select the GPX file and choose Import.
Raymarine (Axiom, Element)
- Copy the GPX file to your micro SD card.
- Insert the card and go to My Data > Import.
- Select the GPX file and confirm the import.
Humminbird (Helix, Solix, Apex)
- Copy the GPX file to your micro SD card.
- Insert the card and go to Nav > Menu > Waypoints, Routes, Tracks.
- Select Import and choose the GPX file.
Furuno (NavNet TZtouch, TZtouch2, TZtouch3)
- Copy the GPX file to the root of your micro SD card.
- Remove any other cards temporarily and insert the SD card into your Furuno unit.
- Go to the Home Screen > Settings > Files.
- Select the GPX file and choose Import.
- Remove the card and reinsert any other cards you were using.
Share to Chartplotter Apps
You can also share GPX files directly to chartplotter companion apps on your phone or tablet — no SD card needed.
Garmin ActiveCaptain
- Export from Fishmarks using the Garmin Compatible profile.
- Open the downloaded GPX file and share it to the ActiveCaptain app.
- ActiveCaptain syncs the marks to your Garmin chartplotter over Wi-Fi.
Simrad App (C-MAP)
- Export from Fishmarks using the Simrad / C-MAP App profile.
- Open the downloaded GPX file and share it to the Simrad App (formerly C-MAP Embark).
- The marks appear in the Simrad App and can be synced to your chartplotter.
Simrad App (C-MAP) — Known Issues & Workarounds
The Simrad app (formerly C-MAP Embark) has a history of bugs that affect GPX file imports. We’ve done extensive testing to document these issues and build workarounds so you can still get your marks into Simrad. The findings below are based on our testing as of April 2026 using Simrad App version 4.6.0 (39030) on iOS.
100-Mark Import Limit
The Simrad app can only import up to 100 waypoints per GPX file. Imports with more than 100 marks will report “Successfully imported!” but the marks silently disappear from the app within seconds.
- This is a per-import limit, not a total limit — the app itself can hold up to 10,000 waypoints total.
- You can import multiple files of 100 marks each, and all marks will persist.
- Fishmarks automatically detects when you’re exporting more than 100 marks to the Simrad profile and offers to split the export into batches of 100 for you.
Silent Import Failures
The Simrad app consistently reports imports as “successful” even when they fail. There is no error message, log, or indication that anything went wrong. The only way to know is to check whether the marks actually appear in the waypoints list.
Waypoint Colors Don’t Match
The colors displayed for waypoints in the Simrad app do not match the color values stored in the app’s own GPX exports. For example, waypoints that all appear the same color in the Simrad app may export with different color_id values per category. When importing a Simrad GPX file into Fishmarks or other apps, the colors may not match what you saw in the Simrad app.
Recommended Workflow
- Export from Fishmarks using the Simrad / C-MAP App profile.
- If you have more than 100 marks, accept the prompt to split into batches.
- Share each batch file to the Simrad app one at a time.
- After each import, verify the marks appear in the Simrad waypoints list before importing the next batch.
Alternative: SD Card Method
If direct import to the Simrad app doesn’t work for you, use the Navico (Simrad / Lowrance / B&G) SD Card export profile instead. Copy the GPX file to an SD card and load it directly into your Simrad chartplotter — this bypasses the app entirely and does not have the 100-mark limit.
Tracks
- Open the Track List
- Edit a Track Name
- Delete a Single Track
- Delete Multiple Tracks
- Trim Sections of Tracks
- Lock a Track
Open the Track List
- On the Left Rail, open the Manage group and click Tracks.
- The Track List opens with all your tracks — you can search, sort, filter, and perform bulk actions.
Edit a Track Name
- Open the Track List (Left Rail > Manage > Tracks).
- Click the track name in its row, or click the edit (pencil) icon.
- Type the new name and press Enter to save, or Escape to cancel.
Delete a Single Track
From the Track List
- Open the Track List (Left Rail > Manage > Tracks).
- Find the track you want to delete.
- Click the trash icon on that track’s row.
- Confirm the deletion.
From the Map Popup
- Click a track line on the map to open its popup.
- Click the Delete action inside the popup and confirm.
Delete Multiple Tracks
From the Track List
- Open the Track List (Left Rail > Manage > Tracks).
- Use the checkboxes to select the tracks you want to delete.
- Click Delete Selected and confirm.
From the Map (Track Rectangle / Lasso)
- Show the tracks you want to manage on the map.
- In the Tracks group on the Map Toolbar (left edge), click Rectangle or Lasso. The button turns yellow.
- Drag a rectangle or draw a lasso around the tracks. Tracks that intersect the selection are picked. You can also click individual tracks to toggle them.
- In the yellow tracks selected pill at the top of the map, open Actions and choose Delete, then confirm.
Trim Sections of Tracks
Trim mode lets you cut unwanted portions out of a track — useful for removing the drive from the boat ramp or an accidental side trip.
- In the Tracks group on the Map Toolbar, click the Trim (scissors) button. The button turns yellow to show trim mode is active.
- Draw a lasso around the section of track points you want to remove.
- Those points are cut out of the track; the rest of the track remains intact.
- Click the scissors again to exit trim mode.
Lock a Track
Locking a track prevents it from being accidentally deleted. Locked tracks are also skipped when using the Rectangle or Lasso Track Select tools for bulk operations.
From the Track List
- Open the Track List (Left Rail > Manage > Tracks).
- Click the lock icon in the lock column on any row to toggle its locked state.
- Right-click a track row for bulk-lock / bulk-unlock across multiple selected tracks.
From the Map Popup
- Click a track line on the map to open its popup.
- Click the Lock (or Unlock) action inside the popup.
Lists & Organization
Create a List
- In the sidebar, scroll to the bottom of the Lists section and click Create List.
- Enter a name.
- Optionally pick a color and an icon to make the list easy to spot.
- Click Create.
Add Marks to a List
One Mark at a Time
- Open a mark (click it on the map or in the sidebar).
- In the Edit Mark form, use the Lists field to check the lists you want it in.
- Or right-click the mark in the sidebar and choose Add to List.
Many Marks at Once
- Use Rectangle or Lasso from the Map Toolbar to select marks on the map (or multi-select in the sidebar Marks tab).
- In the selection actions menu, choose Add to List.
- Tick the lists you want, then confirm.
Create a Dynamic List
What is a Dynamic List?
A Dynamic List automatically collects marks based on rules you define — instead of manually adding marks, the list fills itself. For example: “all marks deeper than 30 feet” or “all marks where I caught Snook.”
Creating One
- In the sidebar, click Create List as usual.
- Enter a name, then tick the “Create as Dynamic List using Rules?” checkbox.
- Choose a match mode: ALL conditions (marks must match every rule) or ANY condition (at least one rule).
- Add one or more rules — for example, Depth > 30ft, Species = Snook, Tag contains “reef”.
- Watch the Matching marks preview update in real time.
- Click Save — the list will keep itself current as your data changes.
Trips, Catches & Routes
Log a Trip
Opening the Trips Panel
- On the Left Rail, click Trips in the View group.
- The sidebar switches to the Trips quick panel with search, sort, and a + button.
Creating a Trip
- Click the + button in the Trips panel to log a new trip.
- Enter a trip name, date, and optional notes.
- Link the marks you visited and record weather and water conditions.
- Add any catches you made (see Record a Catch below).
- Click Save.
Managing Trips
- From the Trips quick panel, click any trip row to open its details — linked marks, catches, and stats.
- Edit or delete trips from the trip detail view.
- Use the panel footer to open the full Trip List for advanced filtering and analytics.
Record a Catch
Opening the Catches Panel
- On the Left Rail, click Catches in the View group.
- The sidebar switches to the Catches quick panel with search, species grouping, and a + button.
Recording a Catch
- Click the + button in the Catches panel.
- Pick the trip (or start without one), and enter the species (autocompletes from previous catches).
- Optionally add length, weight, method, and a photo.
- Add notes and click Save.
Viewing Your Catches
- The Catches quick panel shows your full history grouped by species, date, or trip.
- Click any catch row to view details, photos, tide/moon conditions, and linked mark.
- Use the panel footer to open the full Catch List for analytics, personal bests, and which marks produce the best results.
Create a Route
Routes are saved navigation paths you can plan and follow — great for fishing runs or trolling patterns.
Creating a Route
- In the Routes group on the Map Toolbar (left edge of the map), click the + (Create a Route) button. The route builder takes over and a yellow pill appears at the top of the map.
- Click anywhere on the map to add points to your route.
- Click directly on existing marks to include them in the route.
- Once you have at least two points, the yellow pill shows a Save as Route button — click it.
- Give the route a name and description, optionally assign it to a list, and click Save Route.
- To exit the route builder without saving, click the × on the yellow pill.
Managing Routes
- On the Left Rail, open the Manage group and click Routes.
- The Route List shows every saved route with options to show on the map, rename, export, or delete.
- Click a route on the map to open its popup with inline actions.
Friends & Sharing
Add a Friend
- Click your Profile icon in the top-right corner.
- Choose My Friends. The Settings modal opens on the Friends tab.
- Enter your friend’s email address (the one they use for Fishmarks) and click Send Request.
- Your friend gets a notification and can accept or decline. Pending requests appear in the same list.
Share a List with a Friend
Sharing in Fishmarks works through Lists. You share a list with a friend and they get access to every mark in it.
Share a List
- Right-click the list in the sidebar (long-press on mobile).
- Choose Share List.
- Pick a friend from your friends list.
- Choose the permission level: View Only or Can Edit.
- Click Send Invitation.
- Your friend receives a notification and can accept or decline.
What Happens After Sharing
- View Only: your friend sees the marks but cannot add, edit, or delete them.
- Can Edit: your friend can add new marks to the list and edit existing ones.
- Real-time sync: changes sync live — when you add a mark to the shared list, your friend sees it immediately.
Refer a Friend to Fishmarks
- On the Left Rail, open the Social group and click Refer a Friend.
- Copy your personal referral link and send it by text, email, or social media.
- When a friend signs up using your link, both of you can earn perks (check the referral modal for current rewards).
Fishmarks Connect
- What is Fishmarks Connect?
- Getting Started
- The Map Tab
- The Lists Tab
- Add a Mark / Record a Catch
- Trips & Catches
- Transfer: Import & Export
- Symbol Options on Export
- Quick Actions: the More Menu
- Man Overboard (MOB)
- QR Codes — Share Marks, Add Friends
- Weather & Marine Emergency Info
- Friends & Sharing
What is Fishmarks Connect?
Fishmarks Connect is the companion mobile app for Fishmarks — available on the App Store (iOS) and Google Play (Android). It gives you everything you need on the water, in your pocket: browse your marks on a map that knows your location, drop new spots, log catches with photos and conditions, send your marks to your chartplotter app, and call up the weather or VHF channel reference without leaving the boat.
Connect syncs with your Fishmarks account in real time. Add a mark on your phone and it’s on the web app the moment you have signal — and vice versa.
Getting Started
- Install — search Fishmarks in the App Store or Google Play, or grab the install links from www.fishmarksconnect.com.
- Sign in — open the app and tap Sign In. Use the same email/password as the web app, or pick Continue with Apple / Continue with Google if that’s how you signed up. Brand-new? Tap Create Account.
- Allow location when prompted — this lets the map center on you and powers Near-Me, Weather Here, and accurate Add-Mark coordinates.
- Wait for the first sync — on a fresh install Connect pulls down all your marks, lists, trips, and catches. A progress badge shows in the corner. After this, ongoing changes sync incrementally and instantly.
- Pick your defaults — tap your avatar (top-right), choose Preferences, and set units (feet vs meters), default map layer, and other UX preferences. These are stored on the device.
The Map Tab
The Map tab (the default screen) is the heart of the app. Your marks render with the same icons and colors as the web app, and the map follows you as you move.
What’s on the map
- Your location — a blue dot tracks your phone’s GPS in real time.
- Your marks — clustered when you’re zoomed out, individual when you’re zoomed in.
- Trip tracks — if you’ve logged a track on a trip, it’s drawn as a polyline.
Map gestures
- Tap a mark — opens a quick details sheet with name, depth, water temperature, tags, notes, and an Open in Fishmarks button.
- Long-press anywhere — opens an action menu: Add Mark Here, Weather Here, Search Near Here.
- Pinch / two-finger — zoom and rotate.
- Tap the locate button (bottom-right) — recenter on your current location.
Map layers
Tap the Layers button (top-right) to switch between Standard, Satellite, NOAA Charts, and BlueTopo Hillshade. Layer access depends on your plan — same as the web app.
The Lists Tab
The Lists tab is your full waypoint browser. It mirrors the sidebar in the web app: every list you’ve created, plus all marks across them, with search and filter on top.
Browsing & filtering
- Tap a list — see only the marks in that list.
- Search — the search bar at the top filters by name, notes, or tags as you type.
- Sort — tap the sort icon to switch between alphabetical, date created, distance from you, and depth.
- Tap a mark — opens the details sheet, same as on the map.
Add a Mark / Record a Catch
You can drop a new mark or log a catch from anywhere in the app.
Quickest way: the More menu
- Tap the More tab in the bottom bar (the “...” tab).
- Choose Add Mark or Record Catch.
- The form opens with your current GPS coordinates pre-filled.
- Name it, pick a symbol, optionally add depth / water temperature / notes / tags / a list.
- Tap Save.
From a specific spot on the map
- Long-press the spot on the Map tab.
- Choose Add Mark Here from the action menu — the coordinates of that long-press are used instead of your live GPS.
What you can attach to a catch
- Species, weight, length, and method.
- A photo from your camera or photo library.
- The mark you caught it at (Connect auto-suggests the closest mark).
- The trip you’re on (Connect auto-fills if a trip is in progress).
- Tide state and moon phase — auto-tagged from your GPS coordinates and time.
Trips & Catches
The Trips tab
The Trips tab lists every fishing trip you’ve recorded, newest first. Tap any trip to see the marks you visited, the catches you logged, and the conditions at the time.
- Start a new trip — tap the + button at the top of the Trips tab. Give it a name (or leave it as today’s date), add notes, and start logging.
- Auto-conditions — when you start a trip, Connect captures the current tide, moon phase, and weather conditions automatically.
- Track recording — if track recording is on, your route is drawn on the map and saved with the trip.
The Catches tab
The Catches tab is your full catch history — every fish you’ve logged across all trips, sortable by date, species, weight, length, or location. Tap any catch to see its photo, conditions, and the mark it was caught at.
Transfer: Import & Export
The Transfer tab is where you bring data into Connect (Import) and send it back out (Export). On phones, this is the “data portal” that lets your phone replace a laptop for chartplotter handoffs.
Import a GPX or CSV
- Tap Transfer, then Import.
- Tap Pick a file and choose a GPX or CSV from your phone’s Files app, iCloud Drive, Google Drive, or any cloud picker your phone supports.
- Connect detects the source device (Garmin, Simrad, Lowrance, etc.), shows you a preview, and offers the same icon/color override options as the web app.
- Tap Import. Marks appear on the Map and Lists tabs immediately.
Export to GPX or CSV
- Tap Transfer, then Export.
- Choose what to export: All Marks, All Data, or a specific List.
- Pick GPX (chartplotter / GPS) or CSV (spreadsheet).
- If GPX, choose a device profile to ensure the symbols translate correctly:
- Universal GPX — works with anything.
- Garmin Compatible — for Garmin chartplotters & ActiveCaptain.
- Navico (Simrad / Lowrance / B&G) SD Card — for loading via SD card.
- Simrad / C-MAP App — for sharing to the Simrad mobile app.
- Fishmarks (Full Data) — for backups across Fishmarks accounts.
- Tap Export. The share sheet opens — pick your chartplotter app (ActiveCaptain, Simrad App), Files, AirDrop, email, or anywhere else.
Symbol Options on Export
Connect’s Export wizard has the same two power-user toggles as the web app, both inside the selected profile card on Step 2.
Preserve original device symbols
When you import waypoints from a chartplotter, Connect captures each mark’s original symbol alongside the Fishmarks icon. Toggle Preserve original device symbols on, and any mark imported from that brand exports with its exact original symbol — not the default mapping. So a Simrad → Connect → Simrad round-trip comes back the same. The toggle only appears when at least one mark in your export scope has a captured original for the selected brand. Your choice persists across exports.
Customize symbol mapping
Tap Customize symbol mapping inside the profile card to open the Symbol Mapping editor. Tap any row to pick a different target symbol on that brand for the corresponding Fishmarks icon — overridden rows are highlighted, and overrides persist per-profile. Tap Reset on any row to return to default.
Quick Actions: the More Menu
The More tab (the right-most tab) is a one-tap action menu with the things you’ll reach for fastest on the water:
- Add Mark — drop a mark at your current GPS location.
- Record Catch — log a catch (auto-attaches to your current trip and the closest mark).
- Scan QR Code — scan a Fishmarks QR to receive a shared mark or add a friend (see below).
- Man Overboard — emergency MOB beacon (see below).
Man Overboard (MOB)
Tap More > Man Overboard to instantly drop a red MOB pin at your current GPS coordinates. The map flies to the pin, the coordinates are captured for plotter handoff, and a banner across the top shows the bearing and distance back to the pin as you move — so you can return to the spot.
- Tap View on Map in the alert to recenter at any time.
- Tap Cancel MOB when the situation is resolved — the pin clears and the banner dismisses.
- The MOB pin doesn’t save to your account. It’s a transient on-screen waypoint for emergency response, not a record.
QR Codes — Share Marks & Add Friends
Connect uses QR codes for fast, offline-friendly sharing — perfect when you’re on a dock with another captain and don’t want to type emails.
Share a single mark
- Open a mark’s details sheet, tap Share.
- Pick QR code. Connect generates a QR with all the mark’s details encoded.
- The other person scans it from their Connect app (More > Scan QR Code) or their phone’s camera. Either way, the mark imports straight to their account.
Add a friend
- Tap your avatar (top-right) > My Profile > Show My QR.
- Have your friend scan it from their phone (any QR scanner works) — they confirm the friend request and you’re connected.
- You can now share lists, trips, and marks directly with each other.
Weather & Marine Emergency Info
Weather (Captain plan)
Long-press any spot on the Map and choose Weather Here — Connect pulls live conditions and the multi-day forecast for that location: wind speed/direction, gusts, wave height/period, swell, water temperature, tide stage, and moon phase. Or tap the cloud icon at the top of the Map for the forecast at your current location.
Marine Emergency Information
Tap the SOS icon at the top-left of the Map for the Marine Emergency Information sheet — a quick-reference guide that covers what to do in an on-water emergency plus a VHF radio communication guide: Channel 16 (distress), 9 (alt-distress), 13 (bridge-to-bridge), the working channels, NOAA weather channels, and which to use when. No signal needed; the data’s baked in so it’s available even when you’re out of range.
Friends & Sharing
Add friends in Connect and you can share lists, trips, and individual marks directly with them — no email forwarding, no exporting/importing.
- Add a friend — via QR code (above) or via your avatar > My Friends > Add Friend by Email.
- Share a list — from the Lists tab, long-press a list, choose Share, pick a friend and a permission level (View Only or Can Edit).
- Share a trip — on a trip’s detail screen, tap Share Trip. Friends see your route, marks visited, and catches.
- Notifications — the bell icon (top-right) shows incoming share invites, friend requests, and activity from people you share with. Tap to accept or decline.